
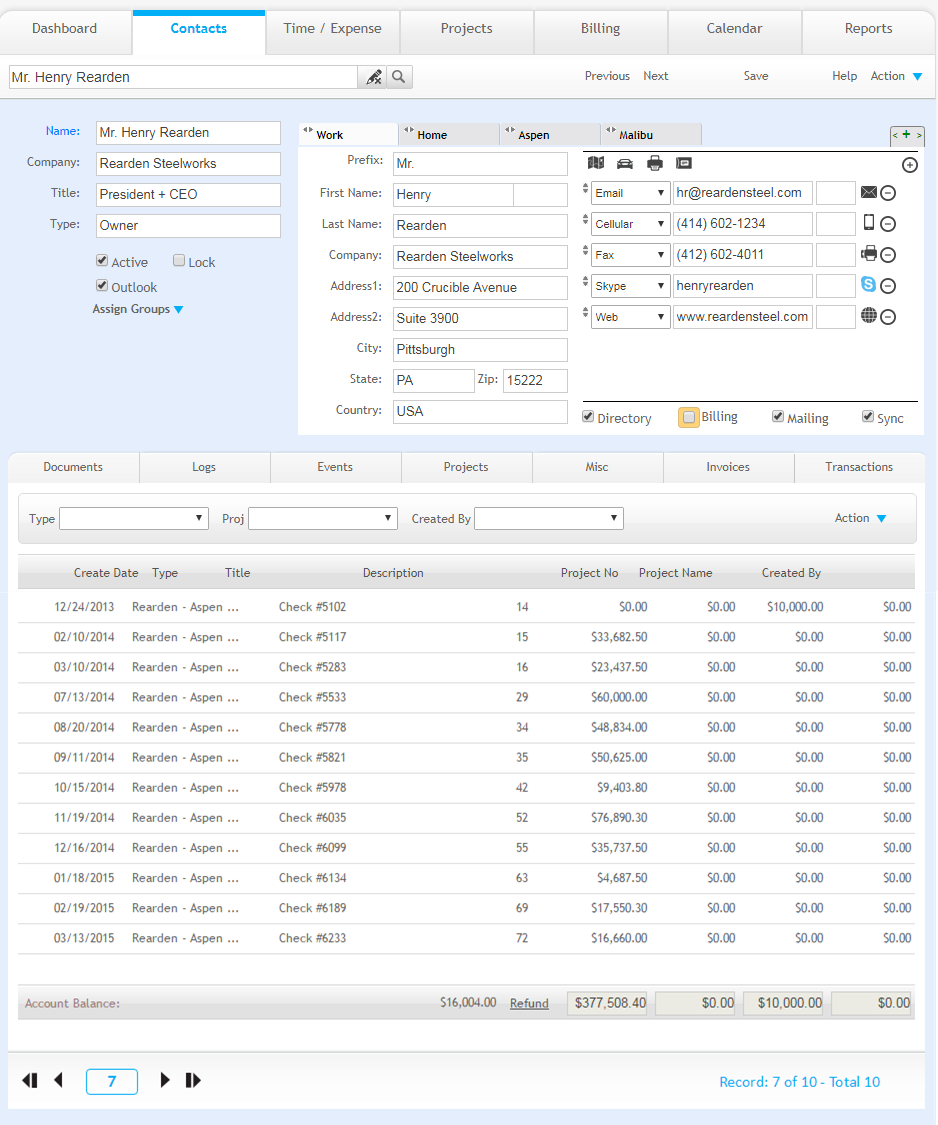
This screen is used to maintain a profile of a contact. You can customize the information to meet your company's unique needs. Profiles can be created for firm employees, clients and vendors.
Information entered on this screen is used on reports or invoices and can be used when determining rates on time and expense entries or budgets. You can view, edit and create contact profiles on this screen.
ArchiOffice Online gives you the flexibility of creating multiple tabs of information to correspond to different address types (for example, Home, Work, etc.). You can add up to six addresses for each contact. Address tabs can be renamed and re-ordered as needed.
Name:
Enter a contact's full name in this field.
Company:
The name of the contact's company. The same name pre-fills the Company field on the Work tab.
Title:
The contact's job title, the title entered will be added as a drop-down list item. You can use the title as a filter to simplify reporting and data management.
Type:
Specify a contact type using this drop-down list. A contact can be an employee, a client, a vendor or any specific type. The type list is set in the Preferences > Contacts > Defaults screen and can be customized to suit your needs.
Active:
Select this check box to include this contact on your active list of contacts (My List view).
Lock:
Select this check box to prevent restricted users from modifying this record.
Assign Groups:
Groups provide for additional categorizing of contacts to later filters for reporting and printing purposes. The group check boxes are defined by the administrator in the Preferences > Contacts > Defaults screen.
Contact Information Tabs
Contact information can be organized into various address types (for example, Work, Home and other information) that you might want to maintain for the contact. Default address types can be specified using the Preferences > Contacts > Defaults screen. The following fields are available on each tab:
You can reorder the address tabs. First, click
![]() on the tab to be moved. Next, click
on the tab to be moved. Next, click ![]() on the tab in the target
location (tab being repositioned).
on the tab in the target
location (tab being repositioned).
The primary contact method (for example, phone number) of a record's first tab displays in the List of Contacts.
Prefix:
The contact's salutation (for example, Mr., Mrs., Dr., etc.). You can either type it or select from the drop-down list.
First/Last Name:
These fields are automatically populated after entering the contact's full name in the Name field on the left side of the screen.
Company:
Enter the contact's company in this field. This field is automatically populated after entering the company name in the Company field on the left side of the screen.
Address1/2:
Two lines are available to enter contact's street name, apartment number, etc.
City:
The contact's city.
State:
Select the contact's state or province from this drop-down list.
Zip:
The contact's zip or postal code.
Country:
The contact's country or region.
Directory:
Select this check box on the address tab that should be used in the Directory reports.
Billing:
Select this check box on the Address tab that should be used for billing purposes. This is the address where any invoices generated for this client are sent.
 This box is color-coded,
indicating the contact's billing status. Click here for more details.
This box is color-coded,
indicating the contact's billing status. Click here for more details.
Mailing:
Select this check box on the address tab where mailings should be sent.
Add New Address Tab 
Click
to add more address tabs. You can switch tabs using the left (<) or
right(>) arrows.
Double click
on an active tab to rename it.
In case of long address names, simply hover over the tab to view the full
name.
Display
Street Map 
Click
to view a street map showing the contact's location.
Display
Driving Directions 
Click
to view driving directions to a contact's location.
The street map and directions are displayed using the mapping service specified using the Preferences -Web Access screen.
Communication Methods
This section shows communication options (for example, Phone, pager, cellular, fax, Skype, etc.) you can use to reach contacts. Click the desired icon to the right of an item to initialize communication using the entered contact information. The list of default communication types is set up in Preferences > Contacts > Defaults.
To change the order of the listed communication
methods, click ![]() for the communication method to
be moved. The color changes to green. Next, click
for the communication method to
be moved. The color changes to green. Next, click ![]() for the other item to be moved.
for the other item to be moved.
Portals
The portals, located below the contact information, show related Logs, Events, Projects, Miscellaneous detail, Invoices and Transactions for a contact from other parts of the system.
Button Panel
Search  :
:
Helps you to search for a specific contact
in a quick, robust way. The field's predictive search instantly displays
results as you type in this field. Click  to clear
the previous search result.
to clear
the previous search result.
Previous:
Click to display the previous contact record.
Next:
Click to display the next contact record.
Save:
Click to save changes made to a contact's record.
Help:
Opens the ArchiOffice Online Help in the Contacts section.
Action
New:
Select to create a new contact.
Duplicate:
Select to duplicate an active contact record.
Delete:
Select to delete a contact record from ArchiOffice Online. This is a secure privilege available only when specifically allowed in the Preferences screen' security option.
Export:
Click to export the data from the first address tab to a tabular format in a .csv file.
My List:
Select to view contacts assigned to you.
Find:
Use this option to locate Contacts matching specific criteria, with the resulting Found Set displayed in the List View.
Re-Find:
Select to return to the last Find criteria so you can modify the requests before executing the search.
Find All:
Select to view all contacts.


